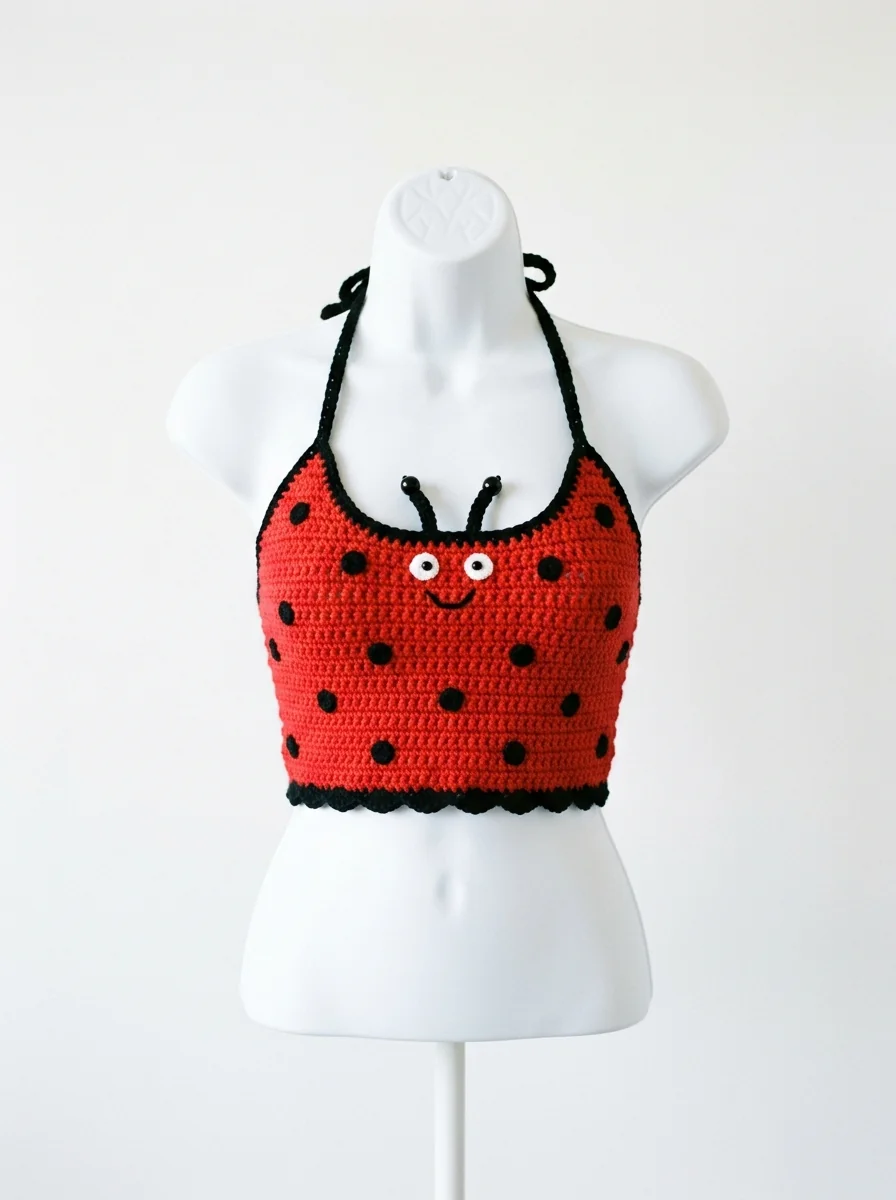
Ladybug crop top crochet is a fitted two-panel summer top with a red body, black spot appliqués and ties that can be adjusted without changing the main fabric. This guide focuses on fit first: make a small swatch, choose the panel width for your own bust measurement, then add the ladybug details after the panels are complete.
Image note: the cover is an illustrative AI concept image for this design. Use the written sizing and construction guide as the reference; yarn choice, gauge and individual fit can change the result.
Project at a glance
- Skill level: confident beginner
- Construction: two rectangular panels, optional shaping, edging, spot appliqués and adjustable ties
- Fit approach: measure your own front width and work to that measurement
- Terminology: US terms; sc = UK dc and dc = UK tr
Materials and fit
- DK or light worsted cotton yarn in red, black and a small amount of white
- 4.0 mm hook, or the hook that gives a comfortable fabric
- Tapestry needle, stitch markers and scissors
- Measuring tape
Measure across the fullest part of the front of the bust where the top will sit. Divide that number by two, then subtract 2–4 cm for light negative ease if you want the fabric to hug the body. The front and back panels should begin at that target width. Cotton has less stretch than many acrylic yarns, so do not skip the measurement step.
Gauge check
Make a 10 cm / 4 in square in double crochet, wash or lightly steam it as you intend to care for the top, and measure again. Count how many stitches equal 10 cm. Multiply the desired panel width by that stitch count to find a starting chain. If you prefer a looser cover-up, add width rather than forcing a loose gauge.
Abbreviations
- ch — chain
- sc — single crochet
- dc — double crochet
- sl st — slip stitch
- st — stitch
1. Crochet the front panel
With red yarn, chain the number calculated from your gauge. Row 1: dc in the fourth chain from the hook and in every chain across. Turn. Rows 2 onward: ch 3, dc across, turn. Continue until the panel reaches from the underbust to the height where you want the neckline to begin.
For a square neckline, continue straight until the panel reaches the desired length. For a gentle center dip, divide the panel in half, work each side separately for 3–5 rows, and leave a small center gap. Keep notes of the number of rows so the second side matches.
2. Crochet the back panel
Make a second rectangle with the same starting chain and row count as the front. A simple back panel keeps the project adjustable and lets the decorative front remain the focus. Hold the panels together at the side edges and check that the underarm opening feels comfortable before joining anything permanently.
3. Join and edge the top
Use red yarn to sew or slip stitch the panels together from the lower edge upward, stopping 4–6 cm below the intended underarm. Work one round of sc around the entire neckline and arm openings to make the edge stable. If the edge pulls inward, use one sc followed by one ch around the tightest section; if it flares, skip a stitch every few centimeters.
4. Add the ladybug spots
With black yarn, make five small circles: 6 sc in a magic ring, join with a sl st and fasten off. Flatten each circle with your fingers. Arrange three circles on the front panel and two near one side or shoulder area; place them asymmetrically so the design feels intentional rather than like a repeated grid. Sew each spot with small stitches through the center and edge.
For a small face detail, embroider two short white lines near the upper front using white yarn. Keep embellishments flat: bulky safety eyes or hard beads can be uncomfortable against the chest.
5. Make adjustable ties
For each shoulder, attach red yarn at the front edge, chain 45–60 depending on the desired tie length, then work sl st back along the chain for a narrow cord. Repeat on the back edge. Tie the front and back cords together at each shoulder. For an underbust tie, attach yarn at one lower side seam, chain across the back width plus 35–45 extra chains, then slip stitch back. Thread the cord through the lower edge or tie it at both sides.
Illustrative fit and assembly map
| Step | Check |
|---|---|
| Swatch | Measure after washing or steaming. |
| Panels | Both panels match in width and row count. |
| Side seams | Leave enough room below the armhole. |
| Spots | Place after trying on the top, not before. |
| Ties | Adjust for support without pulling the neckline. |
Illustrative assembly guide: fit the plain top before adding the ladybug appliqués.
Troubleshooting and care
- Neckline gapes: add one more round of sc, skipping a stitch at regular intervals.
- Panels feel stiff: use a larger hook or a yarn with more drape; do not force a larger size by stretching the fabric.
- Spots curl: lightly steam them before sewing, then stitch through the center and one edge.
- Ties dig in: make a wider chain cord or add a short row of sc along each tie.
Hand wash in cool water and dry flat. This is an original illustrative design guide; check fit, yarn behavior and garment safety on your own materials before making it for a child or for sale.