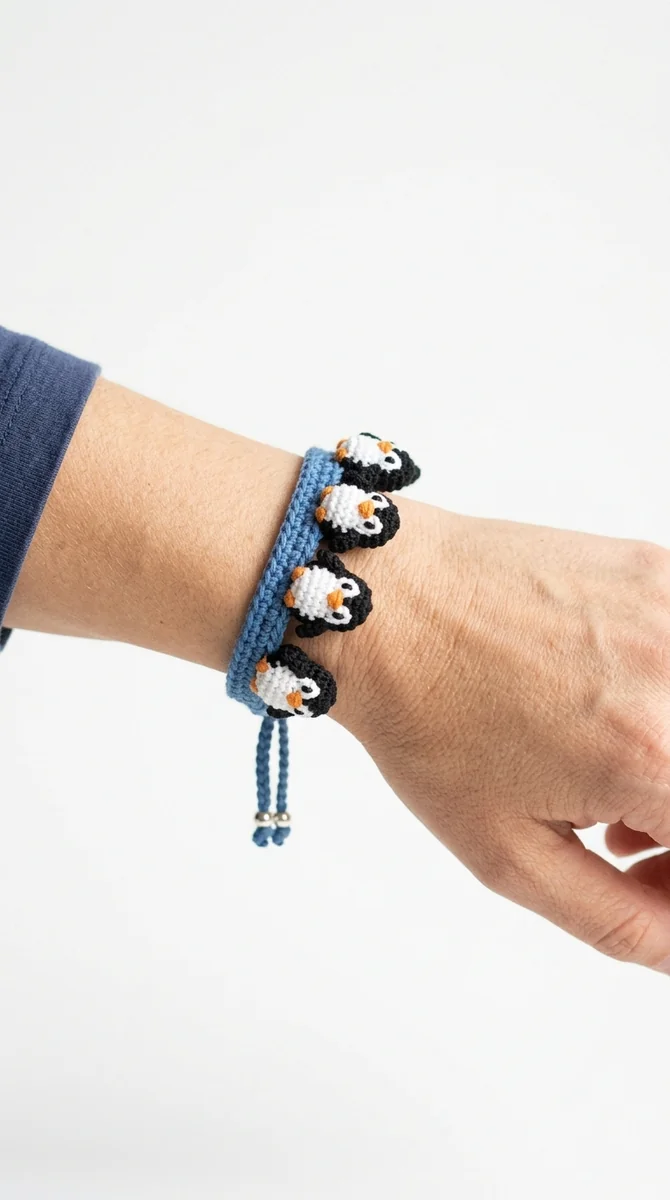
Image note: the featured image is an illustrative AI concept image. Use the written instructions as the pattern reference.
Make a Whimsical Penguin Crochet Bracelet
Note: This pattern uses US crochet terminology. UK/Commonwealth terms: sc = dc, hdc = htr, dc = tr, tr = dtr.
Are you looking for a fun, unique accessory to wear or gift? This adorable penguin crochet bracelet is the perfect blend of cute amigurumi design and practical jewelry. Crafted with soft cotton yarn, it features a tiny, charming penguin head secured onto a comfortable crocheted wrist band. Whether you wear it to a craft fair, make it for a child’s birthday party, or just want a cozy companion on your wrist, this project is simple, quick, and absolutely delightful to make.
In this free tutorial, we will guide you through all the necessary steps to complete this penguin crochet bracelet. Even if you are a beginner at making amigurumi, you will find our step-by-step instructions clear and easy to follow. We will cover the materials needed, stitch abbreviations, how to crochet the comfortable wrist band, how to shape the cute penguin face, and how to assemble the pieces securely. Let’s grab our hooks and get started!
Materials Needed
- Yarn: DK or Sport weight cotton yarn in black (for the head and outer band), white (for the face panel), orange (for the beak), and light blue or grey (for the main bracelet band).
- Crochet Hook: 2.5 mm or 2.75 mm to ensure tight, neat stitches so the stuffing doesn’t show.
- Eyes: black embroidery thread for facial features sewn onto the white panel after assembly.
- Stuffing: A small amount of polyester fiberfill for the head.
- Other Tools: A tapestry needle for weaving in ends, a button (optional, for closure), stitch markers, and scissors.
Stitch Abbreviations (US Terms)
- ch: Chain
- sc: Single crochet
- hdc: Half double crochet
- dc: Double crochet
- inc: Increase (2 sc in one stitch)
- dec: Invisible decrease
- sl st: Slip stitch
- st(s): Stitch(es)
- Rnd(s) / Row(s): Round(s) / Row(s)
Step-by-Step Instructions
Part 1: The Crochet Bracelet Band
The band is worked in flat rows. We want a comfortable, stretchy strap that fits easily around a wrist. You can adjust the length by adding or subtracting rows.
Using light blue or grey yarn:
- Row 1: ch 61. Starting in the second ch from hook, work 1 sc in each chain across. ch 1, turn. (60 sts)
- Row 2: 1 sc in each st across. ch 1, turn. (60 sts)
- Row 3: 1 sc in each st across. ch 1, turn. (60 sts)
- Row 4 (Buttonhole): To create a buttonhole: 1 sc in next 57 sts, ch 2, skip 2 sts, 1 sc in last st. ch 1, turn.
- Row 5: 1 sc in first st, 2 sc in the ch-2 space, 1 sc in remaining 57 sts. (60 sts)
Fasten off, leaving a short tail. Sew a small button to the opposite end of the band. Test the fit on your wrist to make sure it closes comfortably. If you prefer a slip-on style, you can join the ends together with slip stitches instead of using a button.
Part 2: The Penguin Head (Amigurumi)
The head is worked in continuous rounds. Do not join rounds with slip stitches unless instructed.
Using black yarn:
- Rnd 1: Make a magic ring (MR) and work 6 sc into it. (6 sts)
- Rnd 2: Work [inc] in each of the 6 stitches. (12 sts)
- Rnd 3: Work [1 sc, inc] × 6. (18 sts)
- Rnd 4: Work [2 sc, inc] × 6. (24 sts)
- Rnd 5: Work [3 sc, inc] × 6. (30 sts)
- Rnd 6-10: Work 1 sc in each st around. (30 sts)
- Rnd 11: Work [3 sc, dec] × 6. (24 sts)
- Rnd 12: Work [2 sc, dec] × 6. (18 sts)
At this stage, begin adding light filling. Do not insert eyes before the white face panel is attached: this version uses eyes embroidered on the finished panel, so the panel cannot cover pre-installed features.
- Rnd 13: Work [1 sc, dec] × 6. (12 sts)
- Rnd 14: Work [dec] × 6. (6 sts)
Fasten off, weave the tail through the front loops of the remaining 6 stitches, pull tight to close the opening, and hide the yarn end inside the head.
Part 3: The Face Panel (White)
To give our penguin its signature face, we will crochet a flat panel using white yarn and sew it onto the front of the head.
Using white yarn:
- Row 1: ch 5. Starting in second ch from hook, work 4 sc. ch 1, turn. (4 sts)
- Row 2: inc, 2 sc, inc. ch 1, turn. (6 sts)
- Row 3-4: 1 sc in each st across. ch 1, turn. (6 sts)
- Row 5: dec, 2 sc, dec. ch 1, turn. (4 sts)
- Row 6: dec, dec. (2 sts)
Position the white panel on the head and sew around its edge. Embroider two eyes on its upper half with black thread; add the orange beak centered beneath them. Hide ends inside the head and check that the face remains flat.
Part 4: The Beak (Orange)
Using orange yarn:
- Row 1: ch 3. Work 1 sc in second ch from hook, and 1 hdc in the next ch.
Fasten off, leaving a long tail. Sew the beak directly onto the center of the white face panel, just between the eyes. Secure it tightly and weave in the ends.
Assembly and Attaching to the Band
Once your penguin head is fully completed and the face details are in place, it is time to attach it to the bracelet band. Find the exact center of the crocheted band. Pin the bottom of the penguin head to the center of the band. Using a strong tapestry needle and black yarn, sew the head securely onto the band, passing the needle through both the bottom stitches of the head and the stitches of the band several times. Ensure that the sewing is tight and double-knotted on the underside so it can withstand daily wear on a wrist.
Styling and Customization Ideas
This penguin crochet bracelet is highly customizable! You can change the band color to match your outfits or use glittery yarn to make it sparkle. You can also embroider a tiny star or heart next to the penguin on the band. If you want to make it even more playful, you can attach small crocheted flowers or fish charms next to the penguin head. It’s a wonderful way to express your personal style!
Care and Washing Instructions
To keep your handmade bracelet clean and in perfect condition, we recommend washing it by hand in cool water with a mild detergent. Gently squeeze the water out without wringing or twisting, reshape the band and head, and lay it flat to dry in a well-ventilated area away from direct sunlight. Do not machine wash or tumble dry, as this can damage the safety eyes and cause the yarn to pill or shrink.
Pattern status: these are AI-assisted written instructions, not a physically sample-tested pattern. The cover is a concept illustration; finished measurements and appearance depend on materials and tension.
Related construction guides
For another project in this collection, see Dog Crochet Bracelet: Button Cuff and Puppy Crochet Bracelet with Ties. Compare its materials and construction before choosing your next piece.