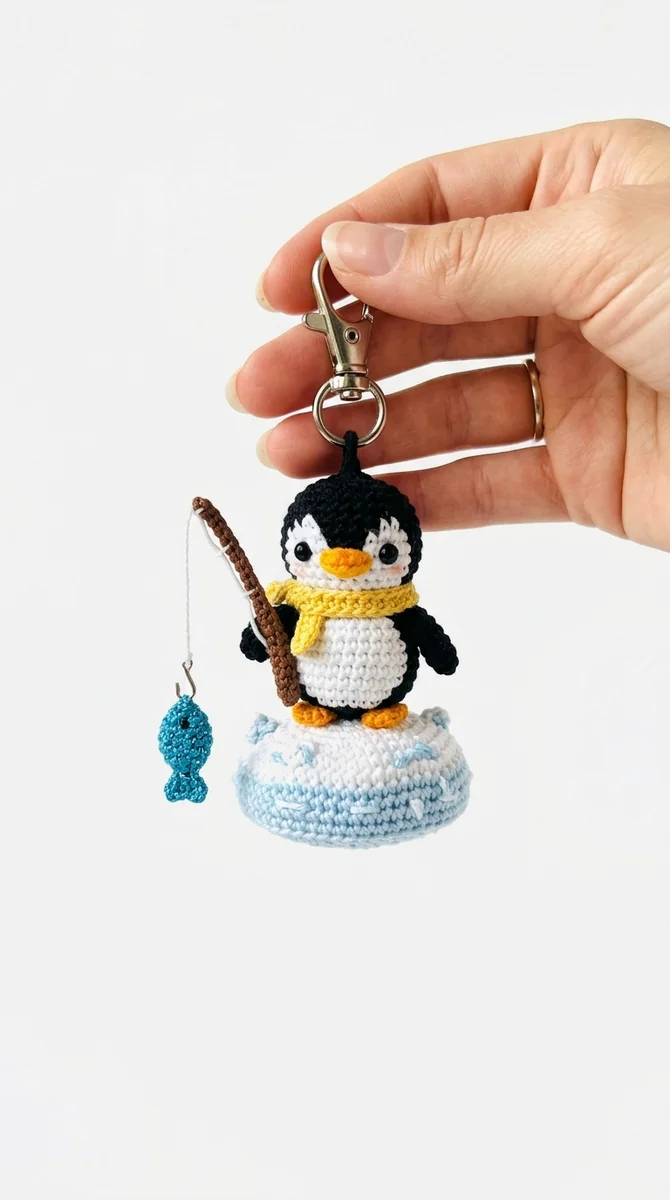
Image note: the featured image is an illustrative AI concept image. Use the written instructions as the pattern reference.
Introduction to the Fishing Penguin Crochet Keychain
Note: This pattern uses US crochet terminology. UK/Commonwealth terms: sc = dc, hdc = htr, dc = tr, tr = dtr.
This charming penguin crochet keychain features an adorable little penguin out on a fishing adventure, complete with a tiny felt or crocheted fishing rod and a small fish. Combining the irresistible cuteness of penguins with a fun storytelling element, this project is a wonderful accessory for your keys, backpack, or purse. It is a quick and engaging project that makes a delightful handmade gift for animal lovers and fishing enthusiasts alike.
Creating small amigurumi keychains is a highly satisfying way to practice shaping and sewing in miniature. In this detailed, step-by-step guide, we will walk you through the materials needed, stitch abbreviations, round-by-round instructions for the penguin body, and details on how to assemble all the tiny accessories. Let’s get started on this pocket-sized adventure!
Materials and Tools Needed
To make your fishing penguin keychain, gather the following materials. Since it is small, it’s perfect for using up scrap yarn:
- Yarn: Sport weight cotton yarn in dark blue or black (for the main body), white (for the face/belly), yellow or orange (for the beak and feet), and a small amount of grey or brown (for the fishing rod).
- Crochet Hook: Size 2.0 mm or 2.25 mm. A small hook is essential to keep the stitches tight so that no stuffing shows through.
- Eyes: 5 mm or 6 mm black safety eyes.
- Fiberfill: A small amount of polyester stuffing.
- Metal Keychain Ring: With a small chain.
- Tapestry Needle & Scissors: For assembly and finishing.
- Rod material: brown yarn for a soft crocheted strip. This carrying charm uses no toothpick or internal wire.
Stitch Abbreviations (US Terms)
Familiarize yourself with these standard stitch terms before starting:
- MR: Magic Ring
- ch: Chain stitch
- sc: Single crochet
- inc: Increase (2 sc in the same stitch)
- dec: Decrease (invisible single crochet decrease)
- sl st: Slip stitch
Step-by-Step Pattern Instructions
Part 1: The Penguin Body (Head and Torso)
The body is worked in one continuous piece from the top of the head down to the base.
Round 1: Using dark blue or black yarn, work 6 sc in a Magic Ring. (6 sts)
Round 2: Work 2 sc in each stitch around (inc x 6). (12 sts)
Round 3: Work (1 sc, inc) six times. (18 sts)
Round 4: Work (2 sc, inc) six times. (24 sts)
Round 5: Work (3 sc, inc) six times. (30 sts)
Round 6-10: Work 1 sc in each stitch around. (30 sts for five rounds)
Round 11: Work (3 sc, dec) six times. (24 sts). Insert safety eyes between rounds 7 and 8, leaving about 5 stitches open between them.
Round 12: Work (2 sc, dec) six times. (18 sts). Stuff the head firmly.
Round 13: Work (2 sc, inc) six times. (24 sts)
Round 14-17: Work 1 sc in each stitch around. (24 sts for four rounds)
Round 18: Work (2 sc, dec) six times. (18 sts)
Round 19: Work (1 sc, dec) six times. (12 sts). Stuff the body firmly.
Round 20: Work 6 dec. Fasten off and weave in the end to close the opening.
Part 2: Face and Belly Panel
This white panel gives the penguin its classic look.
Row 1: Using white yarn, chain 5. Start in second chain from hook and work 4 sc. Chain 1, turn. (4 sts)
Row 2: Work 1 inc, 2 sc, 1 inc. Chain 1, turn. (6 sts)
Row 3-6: Work 1 sc in each stitch across. Chain 1, turn. (6 sts)
Row 7: Work 1 dec, 2 sc, 1 dec. Fasten off, leaving a long tail for sewing. Position this panel on the front of the penguin body, framing the safety eyes, and sew it in place.
Part 3: Wings and Beak
Wings (Make 2): Using dark blue or black yarn, chain 5. Work 1 sl st, 1 sc, 1 hdc, 1 sc back down the chain. Fasten off, leaving a tail. Sew the wings to the sides of the body.
Beak: Using orange yarn, chain 2. Work 1 sc in the second chain. Fasten off and sew between the eyes.
Part 4: The Tiny Fish and Rod
Tiny Fish: Using a bright color (like red or orange), chain 4. In the second chain from hook work: 1 sl st, 1 sc, 1 sl st. To make the tail fin, chain 2, slip stitch back into the last stitch. Fasten off.
Fishing rod: ch 10 in brown and work nine slip stitches back from the second chain. Sew the resulting strip along the forward wing and against the body at a second point. Add a short yarn line and sew the fish near its end, then tack the fish to the body so it cannot swing freely.
Assembly and Keychain Attachment
- Sew the beak and belly panel to the face.
- Sew the wings to the sides of the penguin. One wing should point slightly forward to “hold” the fishing rod.
- Sew the soft yarn rod to the wing and body at two points; keep its line short and the fish secured close to the body.
- Thread your metal keychain loop through the top of the penguin’s head. Sew a few reinforcement stitches around the loop attachment point to make sure it doesn’t pull loose.
- Weave in all remaining yarn tails through the body and trim closely.
Pro Tips for Best Results
- Clean Seams: When sewing the white belly panel to the dark body, use small, hidden running stitches so that the dark yarn does not show through the white borders.
- Secure keychain: anchor the doubled yarn loop through several crown stitches. Filling is not an anchor; the attachment must be secured to the crochet fabric itself.
Pattern status: these are AI-assisted written instructions, not a physically sample-tested pattern. The cover is a concept illustration; finished measurements and appearance depend on materials and tension.
Related construction guides
For another project in this collection, see Lighthouse Keeper Penguin Crochet Guide and Penguin Barista Crochet Keychain. Compare its materials and construction before choosing your next piece.