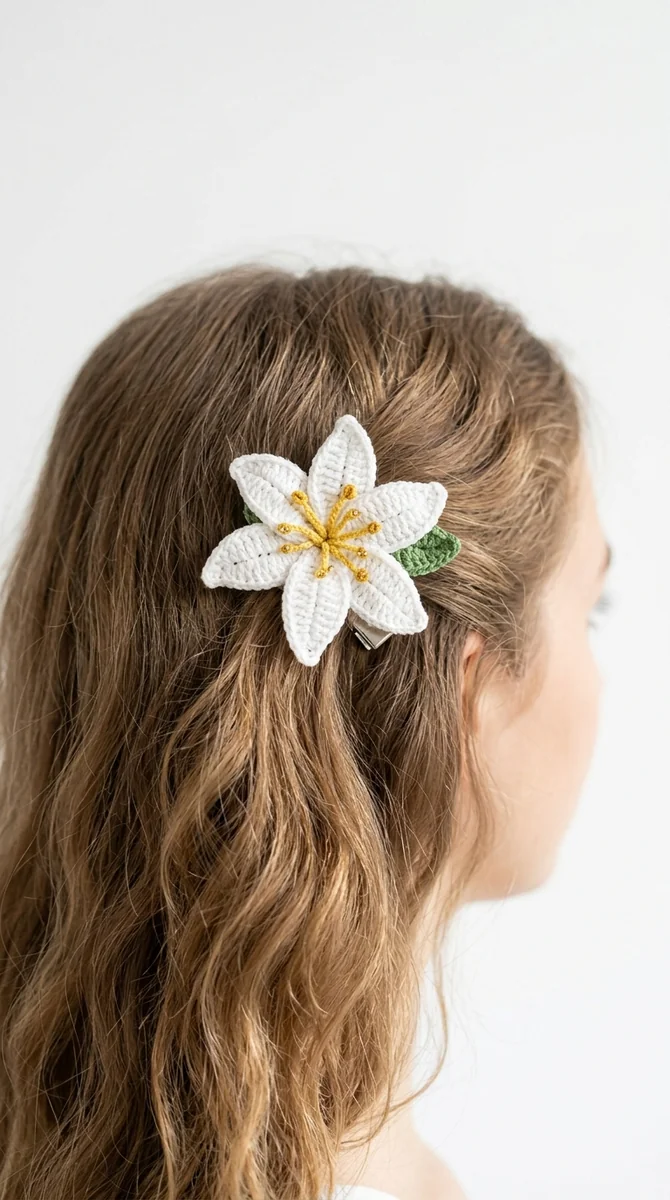
Image note: the featured image is an illustrative AI concept image. Use the written instructions as the pattern reference.
Why You’ll Love This Crochet Lily Hair Clip
Note: This pattern uses US crochet terminology. UK/Commonwealth terms: sc = dc, hdc = htr, dc = tr, tr = dtr.
This beautiful lily hair clip is the perfect handmade accessory to add a touch of nature and elegance to any hairstyle. Whether you are dressing up for a special event or looking for a cute everyday hair decoration, this project is fast, fun, and highly rewarding. Crocheting flowers is a wonderful way to use up leftover yarn scraps, and the result is a durable, stylish hair clip that makes a wonderful gift for friends and family.
The design features a classic white lily flower with soft yellow details in the center, flanked by two delicate green leaves. The entire structure is securely attached to a metal alligator clip. It is designed to be sturdy enough for daily wear, yet soft and lightweight so it won’t pull on your hair. Follow our comprehensive tutorial below to create your very own lily hair clip.
Materials and Tools Needed
Before you begin, gather the following materials. Since this is a small accessory, you only need small amounts of each color:
- Yarn: Medium weight (DK or Sport weight) cotton yarn in white (for petals), green (for leaves), and yellow (for the center pistils). Cotton yarn is highly recommended for hair accessories because it holds its shape much better than acrylic.
- Crochet Hook: 2.5 mm or 3.0 mm hook, depending on your tension. A smaller hook ensures your stitches are tight and defined.
- Metal Hair Clip Base: A standard 5 cm or 6 cm alligator clip (silver or bronze).
- Hot Glue Gun: Or a strong fabric glue to attach the crocheted flower and leaves to the metal clip.
- Tapestry Needle: For weaving in ends and assembling the pieces.
- Scissors: For cutting yarn.
Crochet Abbreviations
Here are the abbreviations used in this pattern. Make sure you are familiar with these basic stitches before starting:
- ch – chain
- sc – single crochet
- hdc – half double crochet
- dc – double crochet
- tr – treble crochet
- sl st – slip stitch
- st(s) – stitch(es)
- MR – magic ring
Step-by-Step Lily Petals Pattern (Make 5)
We will crochet five individual petals and then assemble them. Using white yarn and your 2.5 mm hook, work as follows:
Petal round 1: ch 10. Starting in the second chain, sc, hdc, dc in each of the next five chains, hdc, then 3 sc in the last chain. Rotate; in unused loops along the other side work hdc, five dc, hdc and sc. Join to the first sc. Count 20 stitches, with a three-sc group at the far tip.
Petal round 2: ch 1 and sc in every stitch around (20 sc). Mark the middle stitch of the three-sc tip group from round 1 so you can locate it for the pointed border.
Petal round 3: sc in each stitch except at the marked tip, where you work sc, ch 2, sc in the same stitch. Join to the first sc: 21 sc plus the ch-2 tip. Fasten off with a sewing tail. Make five matching petals for this stylized flower.
Step-by-Step Leaves Pattern (Make 2)
Using green yarn, we will make two leaves. The process is very similar to the petals but with a slightly different stitch sequence to make the leaf look wider:
Round 1: Chain 12. Starting in the second chain from hook, work 1 sc. Work 1 hdc in the next stitch. Work 1 dc in each of the next 2 stitches. Work 1 tr in each of the next 3 stitches. Work 1 dc in the next 2 stitches. Work 1 hdc in the next, and 1 sc in the last chain. Chain 2 to turn the corner.
Round 2: Working on the opposite side of the foundation chain: work 1 sc, 1 hdc, 2 dc, 3 tr, 2 dc, 1 hdc, and 1 sc in the last loop. Join with a slip stitch to the first sc.
Round 3: Chain 1. Work 1 sc in each stitch around the leaf. At the leaf tip, work [1 sc, chain 2, 1 sc] to create a sharp leaf point. Sl st to join. Fasten off and weave in the green yarn ends.
Flower Center / Pistils
Using yellow yarn, we will create the delicate center of the lily. Cut a piece of yellow yarn about 20 cm long. Tie three small knots close to each other in the middle of the yarn thread. These knots will act as the tiny pistils. Alternatively, you can use a magic ring: work 5 chain loops of [chain 5, sl st into MR] to make a small five-pronged star. Pull the ring tight and leave a tail for assembly.
Assembly and Attaching to the Hair Clip
Now that all the individual components are ready, it is time to bring them together into a beautiful accessory:
- Arrange the Petals: Take the five white petals. Using the yarn tails and your tapestry needle, sew the bases of the five petals together in a circle. Make sure they overlap slightly and form a neat star shape. Secure the center stitches firmly.
- Insert the Center: Thread the yellow pistils through the middle of the flower. Tie the yellow tails securely at the back of the flower, then trim the excess yarn.
- Position the Leaves: Place the two green leaves behind the flower. Arrange them so they peek out from under the petals, pointing slightly outwards. Sew them securely to the back of the white flower structure.
- Prepare the Metal Clip: Cut a small strip of green or white yarn (or felt) to wrap around the top flat part of the metal alligator clip. Apply a thin layer of hot glue to the top of the metal clip, and press the yarn strip onto it. This creates a fabric base which helps the flower stick much better.
- Glue the Flower: Apply a generous amount of hot glue to the prepared fabric base on the alligator clip. Press the assembled lily flower and leaves firmly onto the clip. Hold it in place for 30 seconds to let the glue cool and set completely.
Care and Cleaning Tips
Since hair accessories are handled frequently and exposed to hair products, you may need to clean your clip occasionally. To wash your crochet lily flower hair clip, gently hand wash the crochet part using mild soap and cold water. Avoid soaking the metal clip for too long to prevent rusting. Pat dry with a towel, reshape the petals while damp, and lay flat to dry in a well-ventilated area.
Creative Customization Ideas
While a white lily is classic, you can easily customize this pattern to match your favorite outfits or seasons. Try crocheting the petals in soft pink or purple for a tropical look, or use yellow yarn for a vibrant summer accessory. You can also sew a small pearl bead or a rhinestone in the center instead of the yellow yarn pistils to give it a touch of sparkle. Experiment with different yarn weights to make smaller or larger clips!
Conclusion
Creating this lily hair clip is a quick and satisfying project that adds a handmade touch of beauty to your accessory collection. With just a small amount of yarn and basic crochet stitches, you can make a charming piece that looks complex but is simple to construct. Save this pattern for your next craft day, and don’t forget to share your beautiful results with us!
Pattern status: these are AI-assisted written instructions, not a physically sample-tested pattern. The cover is a concept illustration; finished measurements and appearance depend on materials and tension.
Related construction guides
For another project in this collection, see Peony Crochet Hair Clip: Rolled Petals and Lavender Crochet Hair Clip: Stem Guide. Compare its materials and construction before choosing your next piece.