Puppy Crochet Bracelet: Free Pattern & Step-by-Step Tutorial
Why You’ll Love This Puppy Crochet Bracelet
Note: This pattern uses US crochet terminology. UK/Commonwealth terms: sc = dc, hdc = htr, dc = tr, tr = dtr.
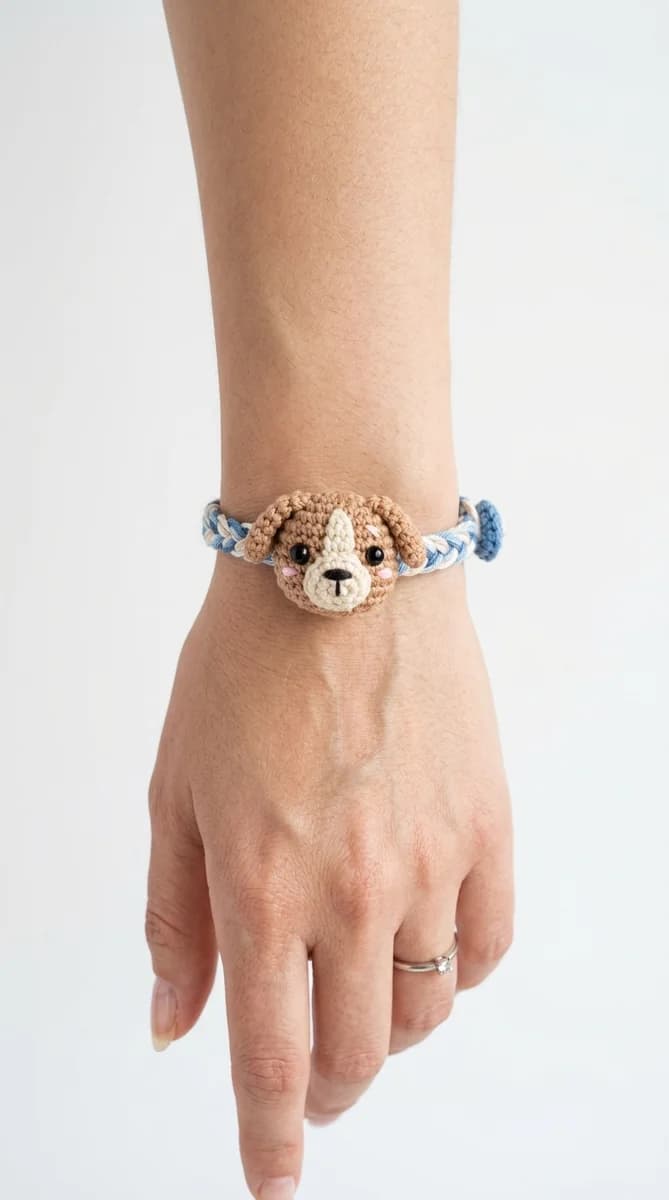
Teeding a cute puppy-crochet-bracelet is one of the quickest and most rewarding projects for crafters of all levels. Combining the functionality of a comfortable wrist accessory with the sheer cuteness of an amigurumi puppy dog face, this project is popular among children and dog lovers alike. It is lightweight, stretchable, and incredibly comfortable to wear all day long.
In this free pattern, we walk you through creating a durable strap and a detailed puppy face with floppy ears. You can use leftover yarn, making it a brilliant stash-buster. Let’s gather the materials and start crocheting!
This design is highly customizable. You can adjust the band size easily to fit newborns, toddlers, teens, or adults. Additionally, the soft texture of cotton makes it a sensory-friendly accessory for younger children. By adding different facial features, you can create various dog breeds with this single base pattern.
Materials and Tools Needed
- Yarn: Light or medium weight cotton yarn. Colors: Cream/Beige (for the strap and main head), Brown (for the ears and patches), and a tiny bit of Black (for embroidering the nose and mouth). Cotton yarn is highly recommended over acrylic because it has less stretch and won’t pill or fuzz after repeated wear on the wrist.
- Crochet Hook: 2.0 mm or 2.5 mm hook to keep the stitches tight and secure.
- Button: One medium wooden or plastic button for the bracelet closure.
- Safety Eyes: 6 mm black safety eyes (optional, embroidery is recommended for baby-friendly wear).
- Polyester Stuffing: A small handful to stuff the puppy head.
- Tools: Tapestry needle, scissors, and a stitch marker.
Abbreviations (US Terms)
- MR – Magic Ring
- ch – Chain
- sc – Single Crochet
- inc – Increase (2 sc in the same stitch)
- dec – Decrease (invisible decrease recommended)
- sl st – Slip Stitch
- st(s) – Stitch(es)
Step-by-Step Pattern
1. The Bracelet Strap
Using Cream yarn. We will work in rows to create a flat, comfortable band.
- Row 1: Ch 61. (This fits a standard 6-inch wrist. Adjust the chain count for larger or smaller wrists in multiples of 2).
- Row 2: Starting in 2nd ch from hook, sc in each ch across (60 sc), ch 1, turn.
- Row 3–6: sc in each stitch across (60 sc), ch 1, turn.
- Buttonhole Row (Row 7): Work sc in next 2 sts, ch 3, skip 2 sts (this forms the buttonhole), sc in each remaining st across. Fasten off and weave in the ends.
2. The Puppy Head
Using Cream yarn. Worked in continuous rounds.
- Round 1: 6 sc in a Magic Ring (6)
- Round 2: inc in each st around (12)
- Round 3: [sc, inc] x 6 (18)
- Round 4: [sc 2, inc] x 6 (24)
- Round 5–9: sc in each st around (24)
- Insert safety eyes between rounds 6 and 7, about 5 stitches apart.
- Round 10: [sc 2, dec] x 6 (18)
- Round 11: [sc, dec] x 6 (12). Stuff the head firmly with polyester fiberfill.
- Round 12: dec x 6 (6). Fasten off, close the hole, and weave in ends.
3. The Floppy Ears (Make 2)
Using Brown yarn. Work in rows.
- Row 1: Ch 4. Starting in 2nd ch from hook, sc 3, ch 1, turn.
- Row 2: inc, sc, inc (5), ch 1, turn.
- Row 3–6: sc in each st across (5), ch 1, turn.
- Row 7: dec, sc, dec (3). Fasten off, leaving a long tail for assembly.
4. The Muzzle
Using White/Cream yarn.
- Round 1: 6 sc in MR.
- Round 2: [sc, inc] x 3 (9). Fasten off, leaving a tail.
- Use black yarn to embroider a small triangular nose and a mouth line onto the muzzle.
Assembly and Finishing Touches
First, sew the muzzle onto the lower front of the puppy head. Position it centered below the eyes. Next, sew the brown floppy ears to the top sides of the head (around Round 3). Press them down so they fold over nicely.
Sew the puppy head securely to the middle of the bracelet strap. Make sure the stitches are tight and reinforced, as the bracelet will be wrapped around the wrist frequently. On the opposite side of the buttonhole on the strap, sew your button securely.
Sizing and Fit Advice
Since cotton yarn stretches slightly, it is best to make the bracelet strap about 0.5 inches shorter than your actual wrist circumference. For babies or small toddlers, make the strap about 45 chains long. Ensure all parts are sewn extremely securely if making this item for small children.
Styling & Customization Ideas
You can customize the puppy bracelet by adding a brown patch over one of the eyes. To do this, simply crochet a magic ring with 6 sc in brown yarn and sew it over the eye area before inserting the safety eye. You can also mix up the colors to resemble different dog breeds, such as a black-and-white Dalmatian or a golden retriever.
Care and Maintenance
Hand wash your crochet bracelet in cold water using a mild wool wash detergent. Do not wring or twist. Press the excess water out using a dry towel and let the bracelet dry flat in the shade. This will ensure that the stuffing inside the puppy head remains evenly distributed and the strap holds its shape.