Penguin Playing Arcade Machine Crochet Amigurumi: Free Pattern
Why You'll Love This Penguin Crochet Amigurumi Pattern
Note: This pattern uses US crochet terminology. UK/Commonwealth terms: sc = dc, hdc = htr, dc = tr, tr = dtr.
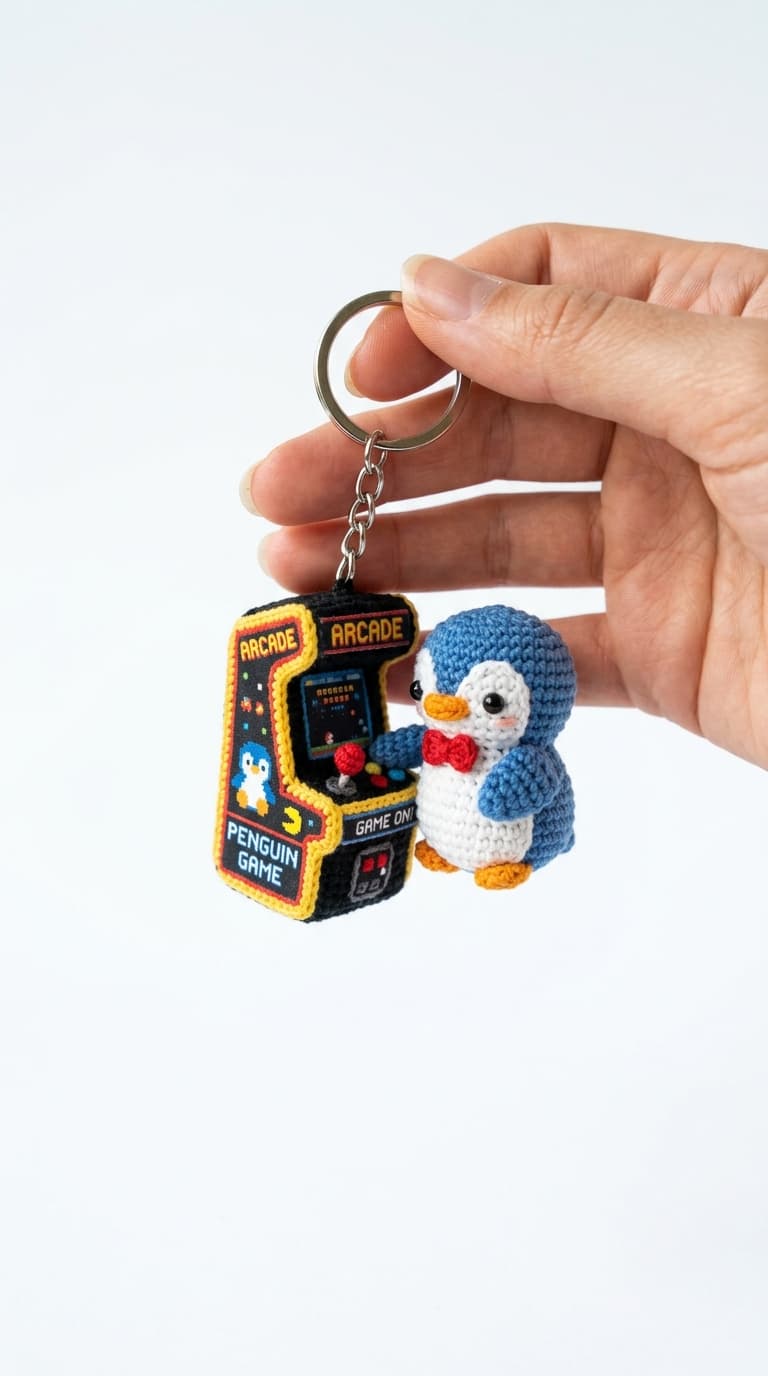
Get ready to level up your crafting with this delightful penguin crochet amigurumi playing a retro arcade machine! This imaginative pattern brings a classic gaming scene to life in yarn. It features an adorable, chubby penguin intensely focused on a miniature, colorful arcade cabinet. It's the perfect project for gamers, 80s nostalgia fans, and anyone who loves creative amigurumi scenes. The contrast between the cute, round penguin and the blocky arcade machine creates a fantastic visual appeal.
This intermediate-level project is a fantastic way to practice shaping both organic (the penguin) and geometric (the arcade cabinet) forms. The finished scene is about 12-14 cm tall, making it a spectacular display piece for your desk or gaming setup. Let's gather our materials and press start!
Materials You Will Need
- Black yarn: Approx. 10g for the penguin's body, head, and wings
- White yarn: Approx. 5g for the penguin's belly and face
- Yellow yarn: Approx. 2g for the beak and feet
- Dark grey/Black yarn: Approx. 15g for the arcade machine body
- Bright neon yarn (pink, green, or blue): Approx. 5g for the arcade screen and buttons
- Crochet hook: 2.5 mm for tight amigurumi stitches
- Polyester fiberfill: For stuffing both the penguin and the arcade cabinet
- Safety eyes: Two 5mm black safety eyes for the penguin
- Yarn needle: For sewing all the components together
- Stitch markers: To track your rounds
- Cardboard (optional): Small pieces to reinforce the arcade machine's shape
Abbreviations
- MR — Magic Ring
- sc — Single Crochet
- inc — Increase (2 sc in the same stitch)
- dec — Invisible Decrease
- BLO — Back Loop Only
- sl st — Slip Stitch
- ch — Chain
- R — Round/Row
Part 1: The Penguin Amigurumi
Let's start by crocheting our enthusiastic gamer! Work in continuous rounds with black yarn.
- R1: MR, 6 sc (6)
- R2: inc in each st (12)
- R3: *sc 1, inc* 6 times (18)
- R4: *sc 2, inc* 6 times (24)
- R5: *sc 3, inc* 6 times (30)
- R6–R12: sc around (30)
At R12, incorporate white yarn for the belly panel (about 8 stitches wide). Insert safety eyes around R7. Begin stuffing.
- R13: *sc 3, dec* 6 times (24)
- R14: *sc 2, dec* 6 times (18)
- R15: *sc 1, dec* 6 times (12)
- R16: dec 6 times (6). Fasten off and close the hole.
Wings (Make 2): In black, ch 6. Sc in 2nd ch from hook, sc 3, 3 sc in last ch. Work down the other side of the chain: sc 4. Fasten off and sew to the sides of the body, pointing slightly forward as if reaching for controls.
Beak & Feet: Use yellow yarn. Beak: ch 3, sc 2, fasten off and sew to face. Feet: MR 4 sc, fasten off, sew to the bottom.
Part 2: The Arcade Machine
This geometric piece requires careful counting to keep its shape. Use dark grey or black yarn.
- Base: Ch 11. Sc in 2nd ch from hook and across (10). Ch 1, turn.
- Rows 2-10: sc across (10).
- Sides (Crochet around the base): sc evenly around the entire rectangle in BLO for the first round to create a sharp edge.
- Height: Continue working in continuous rounds (approx. 40 sts around) for 15 rounds.
- Control Panel: Work only on the front 10 stitches. Sc 10 across for 3 rows. Fasten off.
Tip: Insert cardboard panels cut to size inside the machine to keep the sides perfectly flat before stuffing.
Part 3: Screen and Controls
Now to add the fun details that bring the arcade to life!
- Screen: Using bright neon yarn (e.g., green for a retro look), ch 9. Sc in 2nd ch and across (8). Work 6 rows of sc. Fasten off. Sew onto the upper front of the arcade machine.
- Joystick: In black, MR 4 sc. R2: sc around. Fasten off. Top with a tiny red french knot. Sew to the control panel.
- Buttons: Embroider 2 or 3 bright French knots (pink or blue) next to the joystick.
- Coin Slot: Embroider two small yellow vertical lines on the lower front panel.
Assembly and Finishing
Bring your penguin crochet amigurumi scene together!
- Ensure the arcade machine is firmly stuffed and sealed at the top.
- Position the penguin standing right in front of the arcade machine.
- Sew the penguin's body securely to the base of the machine so they stand together as one piece.
- Adjust the penguin's wings so they rest directly on the arcade control panel, hands on the buttons and joystick.
- Weave in all remaining ends carefully.
Your adorable retro gaming scene is complete! This penguin crochet amigurumi playing an arcade machine is sure to bring a smile to anyone's face. Experiment with different screen colors or even embroider tiny pixels for a custom high score display. Happy crocheting!