Crochet Penguin Fishing Amigurumi Keychain: Free Pattern & Tutorial
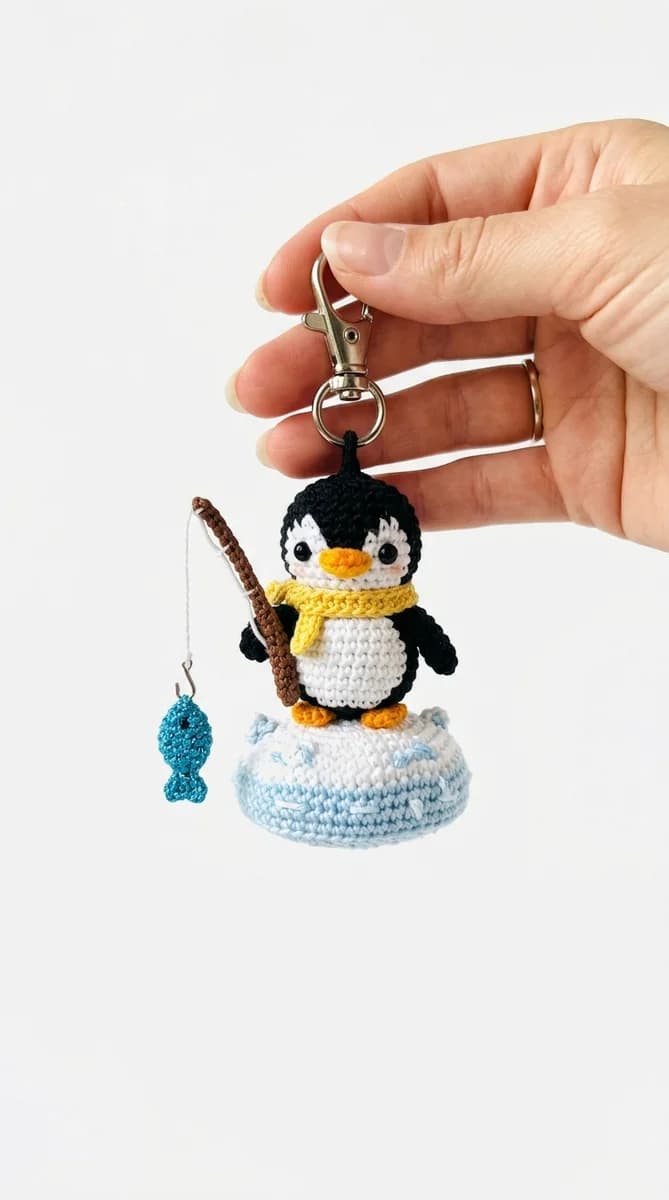
Introduction to the Fishing Penguin Crochet Keychain
Note: This pattern uses US crochet terminology. UK/Commonwealth terms: sc = dc, hdc = htr, dc = tr, tr = dtr.
This charming penguin crochet keychain features an adorable little penguin out on a fishing adventure, complete with a tiny felt or crocheted fishing rod and a small fish. Combining the irresistible cuteness of penguins with a fun storytelling element, this project is a wonderful accessory for your keys, backpack, or purse. It is a quick and engaging project that makes a delightful handmade gift for animal lovers and fishing enthusiasts alike.
Creating small amigurumi keychains is a highly satisfying way to practice shaping and sewing in miniature. In this detailed, step-by-step guide, we will walk you through the materials needed, stitch abbreviations, round-by-round instructions for the penguin body, and details on how to assemble all the tiny accessories. Let’s get started on this pocket-sized adventure!
Materials and Tools Needed
To make your fishing penguin keychain, gather the following materials. Since it is small, it’s perfect for using up scrap yarn:
- Yarn: Sport weight cotton yarn in dark blue or black (for the main body), white (for the face/belly), yellow or orange (for the beak and feet), and a small amount of grey or brown (for the fishing rod).
- Crochet Hook: Size 2.0 mm or 2.25 mm. A small hook is essential to keep the stitches tight so that no stuffing shows through.
- Eyes: 5 mm or 6 mm black safety eyes.
- Fiberfill: A small amount of polyester stuffing.
- Metal Keychain Ring: With a small chain.
- Tapestry Needle & Scissors: For assembly and finishing.
- Toothpick or Craft Wire: To act as the tiny fishing rod.
Stitch Abbreviations (US Terms)
Familiarize yourself with these standard stitch terms before starting:
- MR: Magic Ring
- ch: Chain stitch
- sc: Single crochet
- inc: Increase (2 sc in the same stitch)
- dec: Decrease (invisible single crochet decrease)
- sl st: Slip stitch
Step-by-Step Pattern Instructions
Part 1: The Penguin Body (Head and Torso)
The body is worked in one continuous piece from the top of the head down to the base.
Round 1: Using dark blue or black yarn, work 6 sc in a Magic Ring. (6 sts)
Round 2: Work 2 sc in each stitch around (inc x 6). (12 sts)
Round 3: Work (1 sc, inc) six times. (18 sts)
Round 4: Work (2 sc, inc) six times. (24 sts)
Round 5: Work (3 sc, inc) six times. (30 sts)
Round 6-10: Work 1 sc in each stitch around. (30 sts for five rounds)
Round 11: Work (3 sc, dec) six times. (24 sts). Insert safety eyes between rounds 7 and 8, leaving about 5 stitches open between them.
Round 12: Work (2 sc, dec) six times. (18 sts). Stuff the head firmly.
Round 13: Work (2 sc, inc) six times. (24 sts)
Round 14-17: Work 1 sc in each stitch around. (24 sts for four rounds)
Round 18: Work (2 sc, dec) six times. (18 sts)
Round 19: Work (1 sc, dec) six times. (12 sts). Stuff the body firmly.
Round 20: Work 6 dec. Fasten off and weave in the end to close the opening.
Part 2: Face and Belly Panel
This white panel gives the penguin its classic look.
Row 1: Using white yarn, chain 5. Start in second chain from hook and work 4 sc. Chain 1, turn. (4 sts)
Row 2: Work 1 inc, 2 sc, 1 inc. Chain 1, turn. (6 sts)
Row 3-6: Work 1 sc in each stitch across. Chain 1, turn. (6 sts)
Row 7: Work 1 dec, 2 sc, 1 dec. Fasten off, leaving a long tail for sewing. Position this panel on the front of the penguin body, framing the safety eyes, and sew it in place.
Part 3: Wings and Beak
Wings (Make 2): Using dark blue or black yarn, chain 5. Work 1 sl st, 1 sc, 1 hdc, 1 sc back down the chain. Fasten off, leaving a tail. Sew the wings to the sides of the body.
Beak: Using orange yarn, chain 2. Work 1 sc in the second chain. Fasten off and sew between the eyes.
Part 4: The Tiny Fish and Rod
Tiny Fish: Using a bright color (like red or orange), chain 4. In the second chain from hook work: 1 sl st, 1 sc, 1 sl st. To make the tail fin, chain 2, slip stitch back into the last stitch. Fasten off.
Fishing Rod: Cut a wooden toothpick to about 1.5 inches. Wrap brown yarn or thread around it, securing it with glue. Tie a small piece of sewing thread to the tip of the rod, and tie the other end to the tiny fish.
Assembly and Keychain Attachment
- Sew the beak and belly panel to the face.
- Sew the wings to the sides of the penguin. One wing should point slightly forward to “hold” the fishing rod.
- Glue the toothpick fishing rod under one of the penguin’s wings. Use a tiny drop of fabric glue to hold it secure.
- Thread your metal keychain loop through the top of the penguin’s head. Sew a few reinforcement stitches around the loop attachment point to make sure it doesn’t pull loose.
- Weave in all remaining yarn tails through the body and trim closely.
Pro Tips for Best Results
- Clean Seams: When sewing the white belly panel to the dark body, use small, hidden running stitches so that the dark yarn does not show through the white borders.
- Secure Keychain: Always attach the keychain ring to a double strand of yarn that is anchored deep within the head stuffing to prevent it from tearing the crochet stitches.